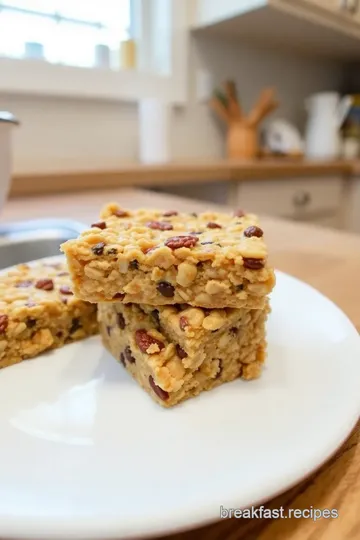
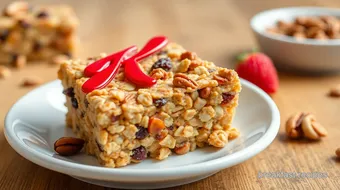
Special K Cereal Energy Bars
Curious about the Special K cereal nutrition label? Discover 7 delicious energy bar recipes packed with nutrition and flavor that cater to your snack needs!

- Have You Ever Wondered How to Turn Your Breakfast Cereal into an Energy Powerhouse?
- Master the Art of Special K Cereal Energy Bars
- Why This Recipe Will Amaze You
- Health and Nutrition Highlights
- Recipe at a Glance
- Master Ingredient List
- Kitchen Equipment Essentials
- Professional Cooking Guide for Special K Cereal Energy Bars
- Game-Changing Tips
- Perfect Presentation
- Storage and Make-Ahead
- Creative Variations
- Complete Nutrition Guide
- Expert FAQ Solutions
- Recipe Card
Have You Ever Wondered How to Turn Your Breakfast Cereal into an Energy Powerhouse?
I mean, really! this little thought sparked one of my favorite cooking adventures in the kitchen. when i first stumbled upon the idea of making special k cereal energy bars, i thought, "what on earth? cereal? in a bar?" it tickled my curiosity.
And let me tell you, this recipe is a great way to shake up your snack game. it's quick to whip together, taking just 15 minutes to prep and about 20 minutes in the oven, making it a breeze.
Not to mention, the difficulty level? easy peasy! even if you’re as clumsy with measuring cups as i am, you won't run into trouble.
Master the Art of Special K Cereal Energy Bars
Let’s dig a bit into the background of what makes these energy bars so great and, in my opinion, perfect for today’s busy lifestyle.
Traditionally, energy bars have been around for ages, crafted by outdoor ensoiasts who needed something quick, portable, and sustaining—hikers, cyclists, you name it.
Fast forward to today, and boom! you’re seeing them everywhere in supermarkets. what makes my twist on the classic energy bar so special is the addition of special k cereal, which not only gives a delightful crunch but also boasts a pretty remarkable special k cereal nutrition label —lower sugar, high fiber, and they’re quite versatile!
Why This Recipe Will Amaze You
I won’t sugarcoat it—these energy bars taste fantastic. the combination of crunchy nuts, chewy dried fruit, and creamy peanut butter honestly makes each bite a little party in your mouth.
Seriously, you haven't lived until you've tried the explosion of flavors in these bars. the recipe is expert-tested, so no more worrying about whether your kitchen skills are up to par.
Oh, and if you’re short on time, i've got some nifty tips to throw in that will save you precious minutes in the kitchen.
Health and Nutrition Highlights
Now, let’s get a little serious, shall we? these bars are packed with nutritious benefits that make them a parent’s dream.
We’re talking about protein from the peanut butter and nuts, fiber from the oats, and loads of energy for your busy days.
Kids love them, and honestly, what's better than slipping something healthy into their snacks? you can also customize them to fit dietary needs! have a nut allergy? no problem.
Just swap out the peanut butter for sun butter and voilà! you can even make vegan versions by simply switching up the honey and peanut butter.
Recipe at a Glance
Before we roll up our sleeves and dive into our ingredient list, let’s break down what you need to know at a glance:
- Preparation time: 15 minutes
- Cooking time: 20 minutes
- Total time: 35 minutes
- Skill level: Easy
- Serving size: 10 bars
Now that you’ve got the scoop, let's get into the nitty-gritty—the ingredients you’ll need. any guesses? well, they can usually be found in your pantry already! this recipe is all about ease and simplicity, perfect for those busy weeknights when you just need something you can snack on without guilt.
So, without further ado, let’s take a look at what you'll need to bring these delicious Special K Cereal Energy Bars to life!

Master Ingredient List
Premium Core Ingredients
When it comes to whipping up these Special K Cereal Energy Bars , you're gonna want to choose quality ingredients. Here’s what you’ll need:
-
2 cups special k cereal
look for the crunchy variety. check that the special k cereal nutrition label isn’t hiding any nasty surprises.Go for those that are high in fiber and low in sugar.
-
1 cup rolled oats
old-fashioned oats work best, but quick oats can be used if that’s all you have.They add that lovely chewy texture. store them in a cool, dry place to keep them fresh for longer.
-
1/2 cup natural peanut butter
always opt for unsweetened, natural peanut butter here. you want just peanuts and salt—no sweetener or weird additives! it keeps the bars healthy.Store in the cupboard or fridge if you like it a bit firmer!
-
1/3 cup honey or maple syrup
both options lend a different flavor profile. raw honey gives an earthy sweetness, while maple syrup adds a lovely caramel note.Whatever you choose, make sure it’s pure and not some weird high-fructose corn syrup concoction.
-
1/2 cup mixed nuts
i love a combo of almonds, walnuts, and pecans for that crunch. make sure they’re roughly chopped, so they mix well throughout the bars.Store your nuts in a cool, dark place to keep their oils fresh.
-
1/3 cup dried fruit
Think raisins, cranberries, or apricots—whatever tickles your fancy! Look for ones without added sugar. They’re deliciously sweet but still healthy. -
1 tsp vanilla extract
Don’t skimp here! Pure vanilla extract can make the world of difference. This ingredient should have a deep, rich aroma; avoid imitation if you can. -
1/4 tsp cinnamon (optional)
cinnamon does wonders for your taste buds, and it’s good for you too! if you’re like me and think “more is more” when it comes to spice, feel free to add more. -
Pinch of salt
Just a little salt will enhance the sweetness of the other ingredients.
Signature Seasoning Blend
While the dry ingredients pull most of the weight in this recipe, if you're looking to get a bit adventurous, why not play with flavors? a dash of ginger or even a touch of cayenne pepper could add an unexpected kick.
It's those little touches that make these energy bars truly your bars.
Smart Substitutions
-
Peanut butter substitute : Allergic or just not a fan? Try almond butter or sunflower seed butter instead; both are rich and creamy.
-
For a vegan twist : Replace honey with agave syrup or another plant-based sweetener. It won’t affect the binding of the bars at all.
-
For gluten-free options : Ensure your oats and Special K are certified gluten-free if you’re avoiding gluten.
-
Seasonal additions : Got fresh berries or a ripe banana lying around? Toss ‘em in!
Kitchen Equipment Essentials
Don’t forget about the tools! You don't need a dozen fancy gadgets to make these bars, but a few essentials will really help:
-
Mixing Bowl : A good-sized bowl is key. I usually resort to my big, trusty wooden bowl that’s seen more than its share of mixing mishaps.
-
Spatula : A flexible spatula makes it easier to mix! And hey, it's good when it comes time to scrape every last delicious bit into the pan.
-
Baking Dish : The 8x8-inch size is perfect. Just make sure you line it with parchment paper. Those edges need to be easily accessible once you're done baking!
-
Measuring Cups and Spoons : Accurate measurements mean the difference between a chewy delight and a crumbly mess. I’ve learned that the hard way!
Pro Ingredient Tips
When you’re browsing the aisles for your ingredients, check for freshness:
-
Look for oats that are in sealed containers; they better not be filled with dust or moisture.
-
For nuts , you want them whole and crunchy. If they smell off, they probably are!
-
Honey has to be thick and pourable; if it’s running like water, it’s either been turned or isn’t fresh.
-
Buy in bulk for savings. Many grocery stores have bulk bins where you can scoop up oats, nuts, and even dried fruits without going overboard on packaging.
As we roll into the next part, it’s time to take these ingredients and get cooking! the steps are quite straightforward, and i promise the delicious smell wafting through your kitchen is worth every minute spent in prep.
Let’s dive into the cooking instructions.
Professional Cooking Guide for Special K Cereal Energy Bars
Creating energy bars is a delightful way to blend nutritious ingredients into something you can grab on the go. let’s take a casual stroll through the process of making special k cereal energy bars .
We'll keep it simple and relatable, sharing some tips and tricks i learned the hard way.
Essential Preparation Steps
The key to any successful recipe? mise en place . translate that fancy term to “everything in its place.” before you even think about turning the oven on, gather your ingredients.
You’ll need 2 cups of special k cereal , a cup of rolled oats, some peanut butter, honey, nuts, dried fruit, vanilla, cinnamon, and a hint of salt.
Next up, it’s all about prep techniques. chop your mixed nuts and dried fruit – i’ve learned the hard way to keep those pieces small, so you don’t end up with awkwardly lumpy bars.
Time management is crucial too. this recipe takes about 15 minutes to prep and 20 minutes to cook, giving you a nice 35-minute window of kitchen zen.
While the bars are baking, you can clean up your station, grab a cuppa, and enjoy the fantastic smell wafting through the house.
Now, organization tips: I usually line my baking dish with parchment paper, leaving a little overhang. This way, once the bars cool, I can simply lift them out. It’s like cooking magic!
Professional Cooking Method
Now to dive into the actual cooking process:
-
Preheat your oven to 350°F (175°C) and prepare your baking dish as mentioned. Trust me, this step matters.
-
In a large mixing bowl, combine your dry ingredients—the special k cereal, rolled oats, mixed nuts, dried fruit, cinnamon, and salt.
Use a sturdy spoon or spatula. just couple of minutes of good stirring will do.
-
For the wet mixture, grab a small saucepan. over low heat, blend the peanut butter and honey or maple syrup.
You're looking for that lovely melting consistency—about 2-3 minutes should do the trick. off the heat, stir in the vanilla extract.
-
Next, pour your warm peanut butter mixture over the dry mix and stir until it’s all combined. If it’s not sticking together, it probably needs more love—like, really press it together.
-
Spoon that delicious mixture into your prepared baking dish, pressing it down firmly with the back of a spatula or your hands—just dampen them a bit to make it easier.
-
Pop it in the oven for about 15-20 minutes . keep an eye on it; you want golden edges, but definitely don’t overdo it, or they’ll turn as dry as a british biscuit left out too long.
-
Once they’re done, let them cool for about 10 minutes . Lift them out using the parchment, and let them cool completely before cutting them into bars.
-
Voilà! You’re ready to enjoy your nutritious snack for breakfast or any time of the day.
Expert Techniques
Now, let's talk about some expert techniques I picked up through trial and error:
- No mixing extravaganzas—keep it simple. Use a spatula for combining; it saves energy and blends ingredients perfectly.
- Timing precision is vital. Check at the 15-minute mark so you can pull the bars out while they’re just golden.
- For quality checks, look for that beautiful golden brown on the edges. If you see that, you’re... chef’s kiss!
Success Strategies
Even the best of us hit snags in the kitchen. Here are some troubleshooting tips:
- If your bars crumble apart, it’s likely you didn’t pack the mixture tightly enough. Some gentle pressing down can fix that.
- Want to ensure they stay fresh? Store them in an airtight container. If you live in a humid area, stick them in the fridge.
Lastly, for perfect results, try to avoid snacking while cutting them; I totally did that last time, and the bars ended up all uneven. Just breathe and take your time.
Going forward, feel free to experiment! Maybe toss in some chocolate chips or swap out the nuts for sunflower seeds. The world is your oyster—or at least, your energy bar.
As we venture into further nuances of these bars, like customizing them to suit your palate or dietary needs, keep that kitchen spirit alive!
Game-Changing Tips
Professional Insights
Let me tell you, one of the best tips i picked up over the years is to treat your ingredients like good friends: respect them , and they’ll deliver amazing flavors.
When working with special k cereal, it’s essential to keep an eye on that special k cereal nutrition label . it’s packed with vitamins and minerals that add nutritional value to your energy bars.
Plus, when you choose high-quality ingredients, especially for something as simple as a homemade snack bar, you can really taste the difference.
Expert Techniques
Batch cooking is a game changer! once i discovered how to make a big batch of these energy bars, my week was transformed.
It’s like having a secret stash of healthy treats ready to go. if you’re uncertain about getting the wet and dry mixture to stick, increase the peanut butter slightly as it helps bind everything together—trust me, i learned that the hard way!
Kitchen Wisdom
Always remember, it’s okay to make mistakes in the kitchen. i once forgot to preheat the oven and nearly ruined a batch of these bars.
So, double-check that little gem! it’s a simple step, but it makes a world of difference.
Success Guarantees
Use your favorite nuts and dried fruits! not only can you customize the flavor, but you can guarantee a snack that you’ll actually want to eat.
Consistency is key—when you find the right method that balances stickiness with crunch, stick with it!
Perfect Presentation
Plating Techniques
Although i’m not a professional chef, i gotta say, plating is where the magic happens. slice those bars into neat squares and arrange them in a colorful bowl for that homey feel.
It’s like inviting someone to indulge in a cozy café meal right at home.
Garnish Ideas
I love throwing on a sprinkle of shredded coconut or a few sesame seeds on top. It accents each bar beautifully and adds a delightful crunch!
Serving Suggestions
These bars are perfect for on-the-go, so stack them in a cute container for lunchboxes or picnics. or, if you’re feeling fancy, serve them on a wooden board alongside yogurt or a refreshing smoothie.
It’s all about creating a moment, right?
Visual Appeal Tips
Want a fun idea? Once you cut them into bars, stack a couple and drizzle a bit of melted dark chocolate for that presentational wow factor. Visually stunning and irresistibly delicious!
Storage and Make-Ahead
Storage Guidelines
Store your energy bars in an airtight container at room temperature, where they’ll last about a week. But honestly, good luck keeping them around that long because they’re just so enticing!
Preservation Methods
If you want to keep them fresh longer, consider wrapping individual bars in cling wrap before tossing them in the container. You'll thank yourself later when you grab one for a snack!
Reheating Instructions
You definitely don’t need to reheat these bars, but if you ever want a warm treat, a few seconds in the microwave should do the trick.
Just don’t overdo it, or they’ll turn into a gooey mess!
Freshness Tips
Keep your ingredients fresh! Store your nuts and dried fruits properly to avoid any rancidity. A single bad nut could ruin the vibe of your delectables.
Creative Variations
Flavor Adaptations
Feeling adventurous? Swap the classic peanut butter with almond or cashew butter. Each brings a unique taste that can really switch things up without losing that energy boost!
Dietary Modifications
Don’t shy away from customizing for dietary needs. Opt for gluten-free oats if that’s your jam or dance around with different sweeteners—maple syrup or agave nectar work wonders!
Seasonal Twists
In the fall, I love adding pumpkin spice or even dried apples for a seasonal variation. It’s a cozy, heartwarming addition that’s perfect for those chilly days.
Regional Variations
Let’s not forget about regional ingredients! if you’re in the mood for something tropical, throw in chia seeds and dried mango.
You can even go savory with herbs like rosemary for a herbaceous bar vibe.
Complete Nutrition Guide
Detailed Breakdown
When looking at the nutrition per bar, you’ve got 180 calories with 5g of protein, making these little squares more than just a tasty snack.
Health Benefits
These bars are fantastic for energy on the go—thanks to that special k cereal nutrition label . the fiber from oats and nuts keeps you full, and they’re high in good fats from the peanut butter.
Dietary Information
Consider these customizable! If you're looking for gluten-free snacks or even vegan options, adjustments are easy peasy. These energy-packed treats can cater to various diets without skimping on flavor.
Portion Guidance
Stick to one or two bars as a quick snack or breakfast option. They are rich enough where one is usually enough to keep you satiated for a few hours.
Expert FAQ Solutions
Common Concerns
One of the biggest questions I get is about rising—don’t worry, these energy bars don’t need any of that. Their strength lies in the binding ingredients and a bit of heat!
Expert Answers
“Can I use any cereal?” Yes, but I find that Special K gives that crunchy goodness you want in homemade bars! Pick your go-to cereal that matches your vibe!
Troubleshooting Guide
If they crumble when you cut, they might’ve been too dry. Next time, be sure to mix them well—or go heavier on the nut butter.
Success Tips
Pre-measuring all your ingredients can be a total game changer. I promise you’ll feel more in control once that oven timer starts ticking!
In conclusion, making these special k cereal energy bars is all about enjoying the process. with a sprinkle of creativity and a dash of patience, you’ll be whipping up delicious, healthy snacks that you’ll love having on hand.
Try a batch today, and let me know how yours turn out!

Special K Cereal Energy Bars Card
⚖️ Ingredients:
- 2 cups Special K cereal
- 1 cup rolled oats
- 1/2 cup natural peanut butter
- 1/3 cup honey or maple syrup
- 1/2 cup mixed nuts (roughly chopped; almonds, walnuts, or pecans work best)
- 1/3 cup dried fruit (raisins, cranberries, or apricots)
- 1 tsp vanilla extract
- 1/4 tsp cinnamon (optional)
- Pinch of salt
🥄 Instructions:
- Step 1: Preheat your oven to 350°F (175°C) and line a baking dish (approximately 8x8 inches) with parchment paper, leaving some overhang for easy removal.
- Step 2: In a large mixing bowl, combine Special K cereal, rolled oats, mixed nuts, dried fruit, cinnamon, and pinch of salt. Stir until evenly combined.
- Step 3: In a small saucepan over low heat, combine peanut butter and honey/maple syrup. Stir gently until melted and well blended (about 2-3 minutes). Remove from heat and add vanilla extract.
- Step 4: Pour the warm peanut butter mixture over the dry ingredients and stir well using a spatula until everything is thoroughly combined. The mixture should be sticky and hold together when pressed.
- Step 5: Spoon the mixture into the prepared baking dish. Use the back of a spatula or your hands (damp, for ease) to press it down firmly into an even layer.
- Step 6: Place the dish in the preheated oven and bake for about 15-20 minutes, or until the edges are slightly golden. Be careful not to over-bake as they can become dry.
- Step 7: Allow the bars to cool in the dish at room temperature for about 10 minutes. Using the parchment paper, lift them out and let cool completely before cutting into squares or bars.
- Step 8: Enjoy your energy bars as a nutritious snack or breakfast option.
Previous Recipe: Pre Filled Easter Eggs: 10 Creative Ideas for a Fun Celebration
Next Recipe: baked french toast paula deen: 10 Best Tips for a Decadent Breakfast